In this twirl effect tutorial I will guide you through a step by step guide to crating abstract images you will love. For each step I have included clear written instructions and informative screenshots to help you on your way and ensure you fully understand each individual step.
The twirl effect can produce endless results and be applied successfully to almost any image. Some images will work well and others not so well. I usually try to use a base image which is bright, colourful and has some contrast. If you don’t get the desired results you are expecting try a different image. You will soon start to develop an eye for what will and will not work. The key is don’t be afraid to experiment.
Just so you know, this page contains affiliate links and as an Amazon Associate I may earn a commission from qualifying purchases at no extra cost to you.
What Is The Twirl Effect?
The twirl effect is a fast and fun way to change any digital photograph into a beautiful and amazing piece of abstract art. There are various ways to create the effect all with very similar workflows. I create the effect by applying three different filters to an image in photoshop.
What Equipment Do I Need?
- PC or Mac Computer
- Adobe Lightroom Classic
- Adobe Photoshop
I created the twirl effect tutorial using Lightroom Classic 2020 and Photoshop 2020 which are both available as part of the Adobe creative cloud photography plan.
Twirl Effect Tutorial
I have provided a download link below to the poppy image I used to make this tutorial. You are welcome to download it to follow along but there is noting stopping you from using your own images.
Lets begin…
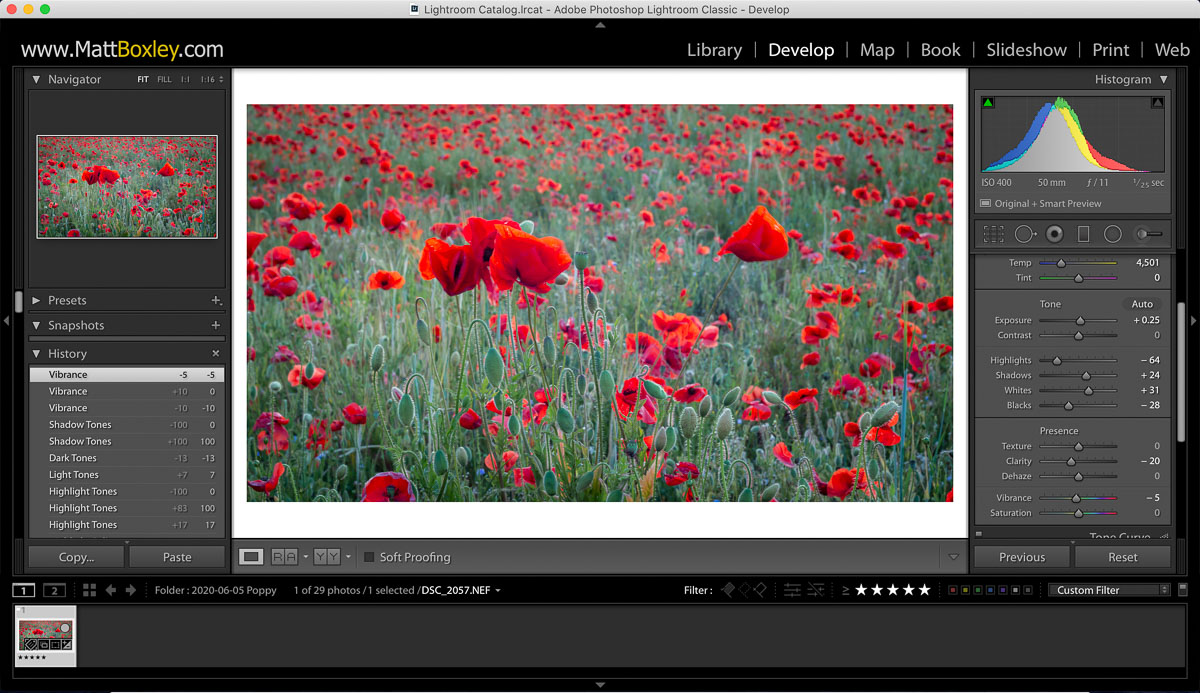
- Select Your Photograph
Open Lightroom Classic and select a colourful image the you want to convert into an amazing abstract piece of art. I have chosen to use the below image as it will offer both colour and contrast when creating the twirl effect.
- Load The Selected Image Into Photoshop
Firstly we need to open our selected image in photoshop. To do this right click on your chosen image in the film strip within Lightroom and select edit in Photoshop as a smart object.
Info:
Opening the image as a smart object is non destructive and allows us to edit each individual step should we not be happy with the desired effect at any point in the future.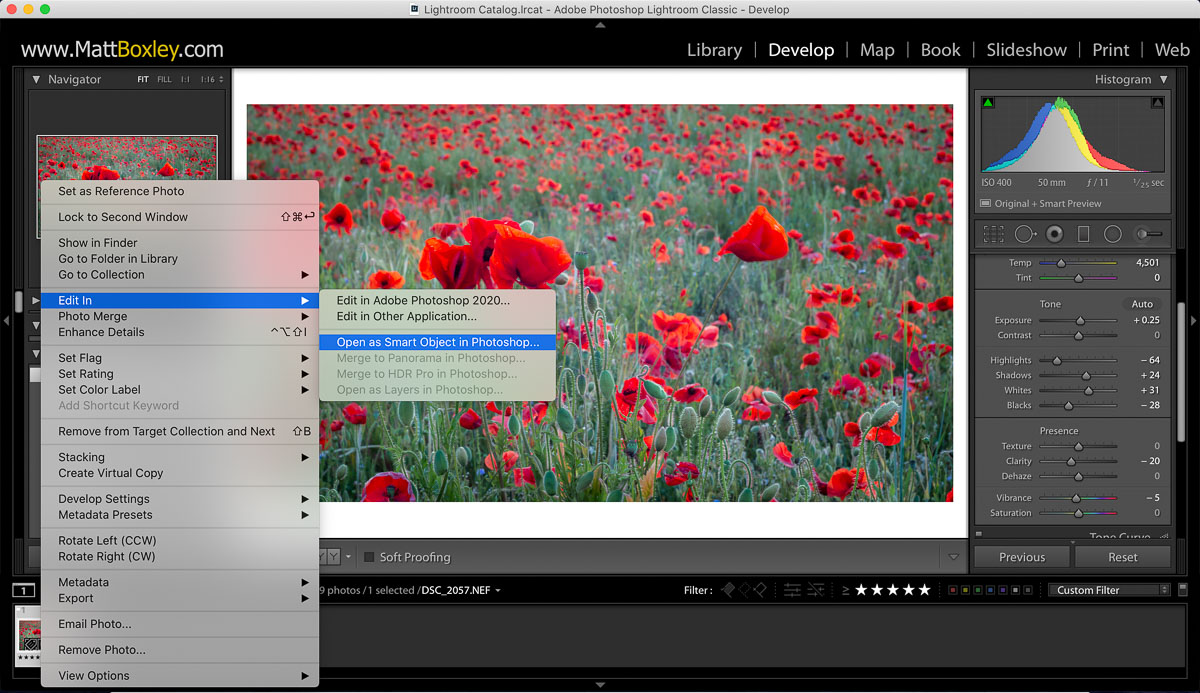
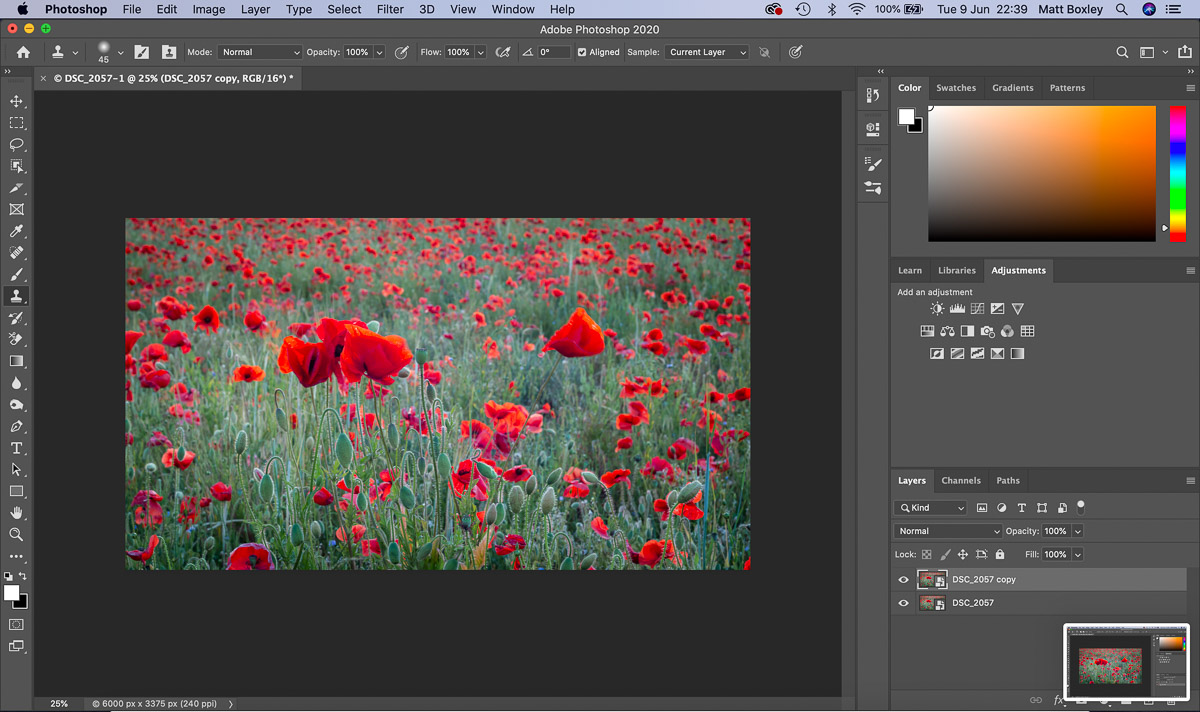
- Duplicate The Layer
With our selected image now loaded in Photoshop the first thing we need to do is duplicate our smart object. There are many ways to do this but my preferred method is to highlight the smart object layer within the layers panel and press command +J on a Mac or ctrl +J on a PC. As confirmation of the duplicated layer you should now see 2 layers in the layers panel as shown below.
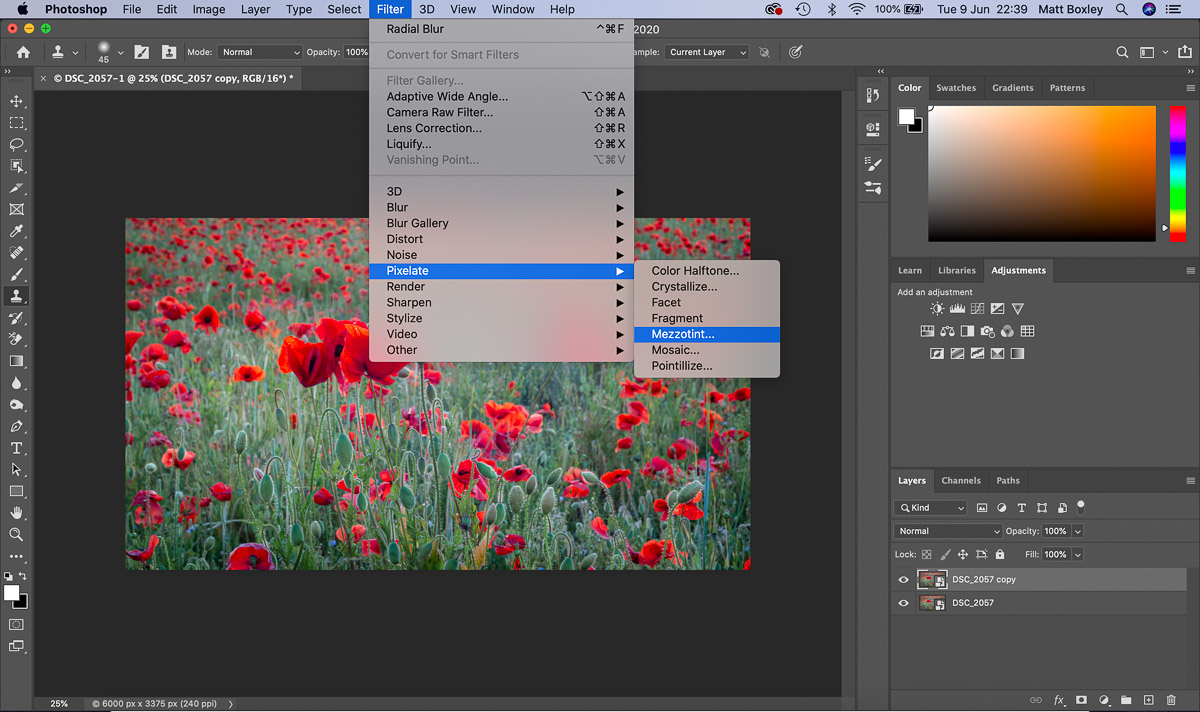
- Filter 1 – Mezzotint
The first filter we are going to apply to our image is Mezzotint. We can load the Mezzotint filter by going to the top filter menu and selecting Pixelate and then Mezzotint. We will apply the Mezzotint settings in the next step.
- Adjust The Mezzotint Filter Settings
The Mezzotint settings panel should now be open. The different options available for this filter can be found in the drop down menu. In this tutorial I am going to select “Long Strokes” and hit the Ok button.
Tip:
It is worth noting that you don’t have to use long strokes. Selecting other methods from the dropdown menu will give a slightly different creative output. Don’t be afraid to experiment with different settings.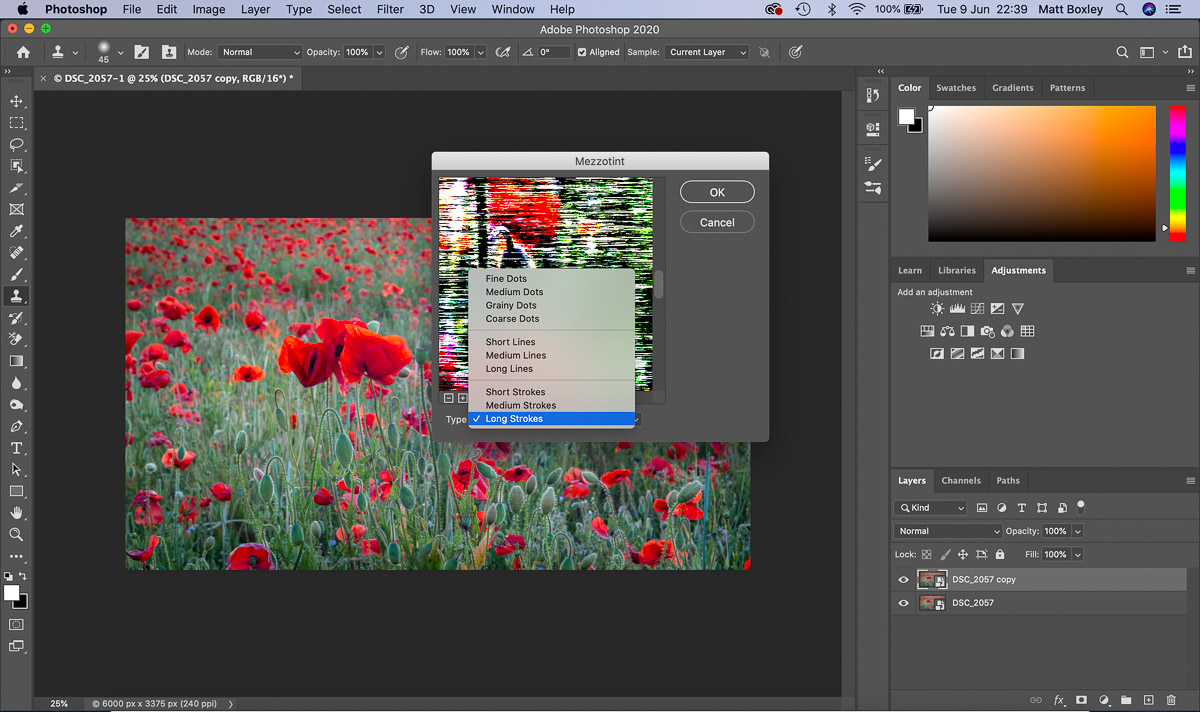
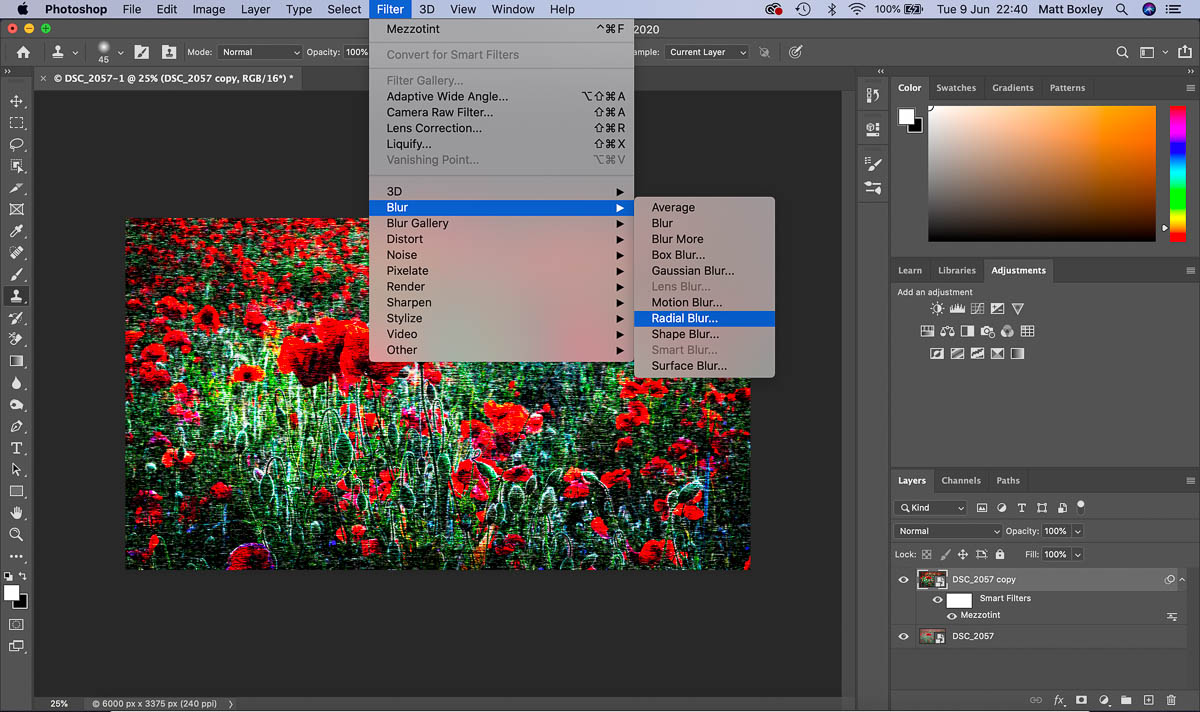
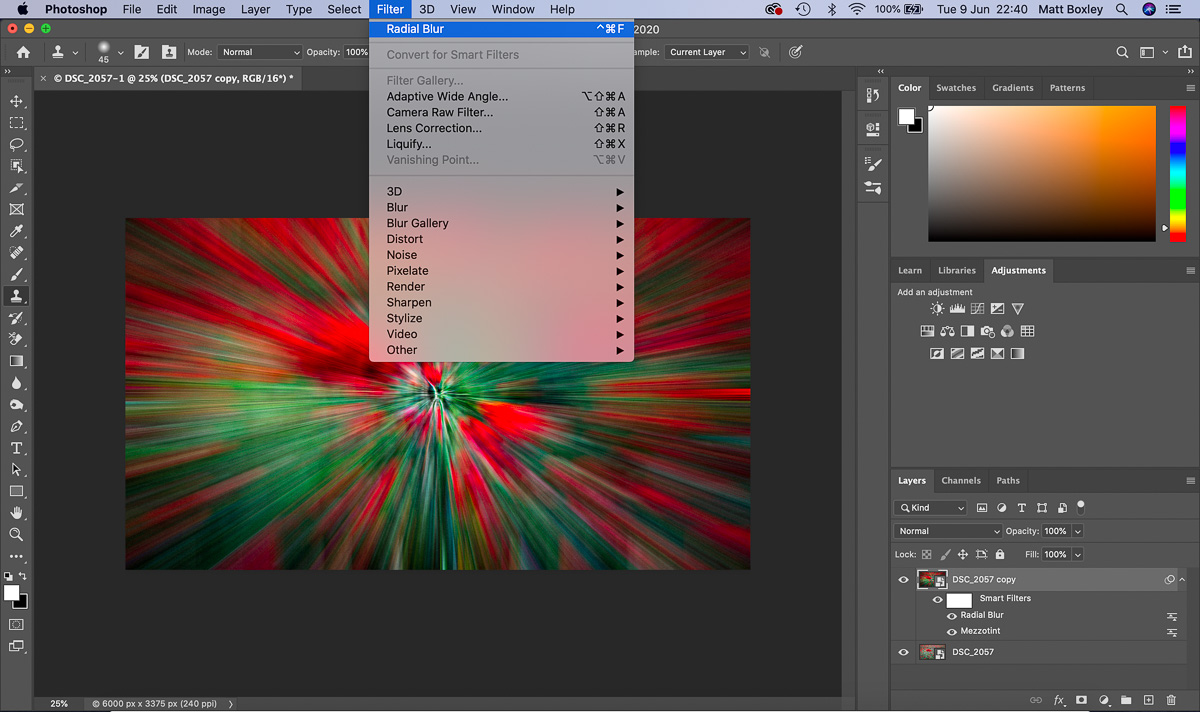
- Filter 2 – Radial Blur
The 2nd filter we are going to apply is a Radial Blur. We can load the Radial Blur filter by going to the filter menu and selecting Blur and then Radial Blur. We will apply the Radial Blur settings in the next step.
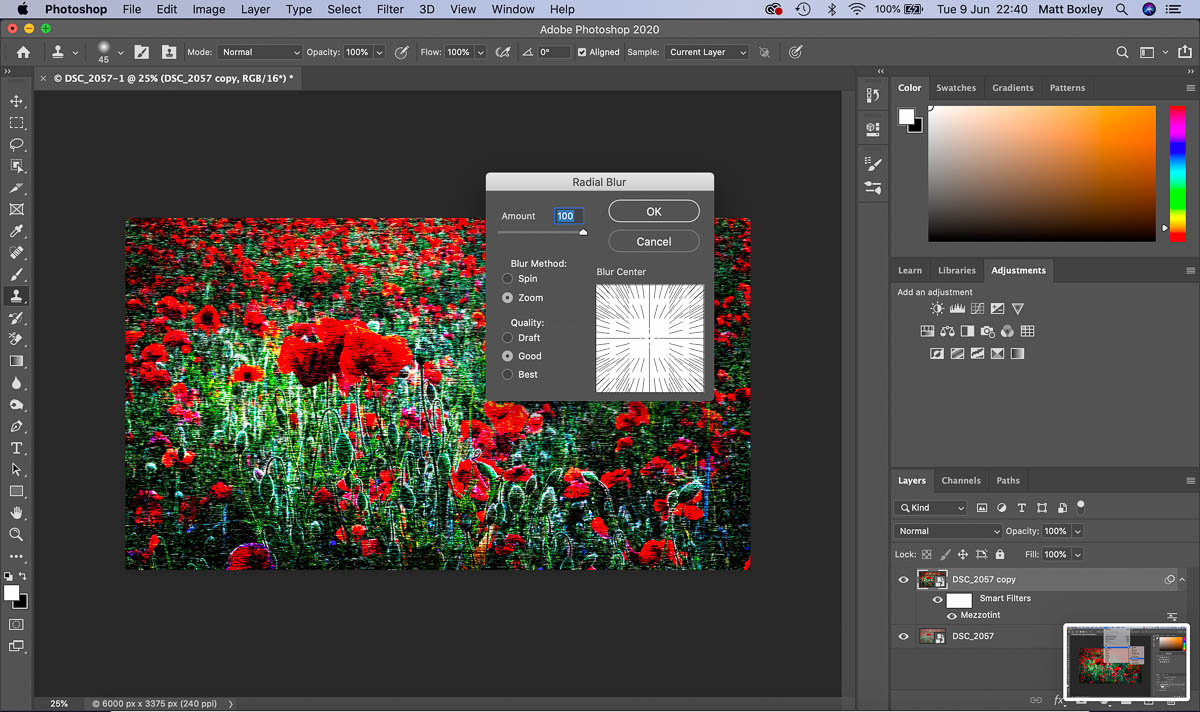
- Adjust The Radial Blur Filter Settings
The Radial Blur settings panel should now be open. We are going to apply the maximum amount of blur which is 100. Our blur method is going to be Zoom with the quality set to Good.
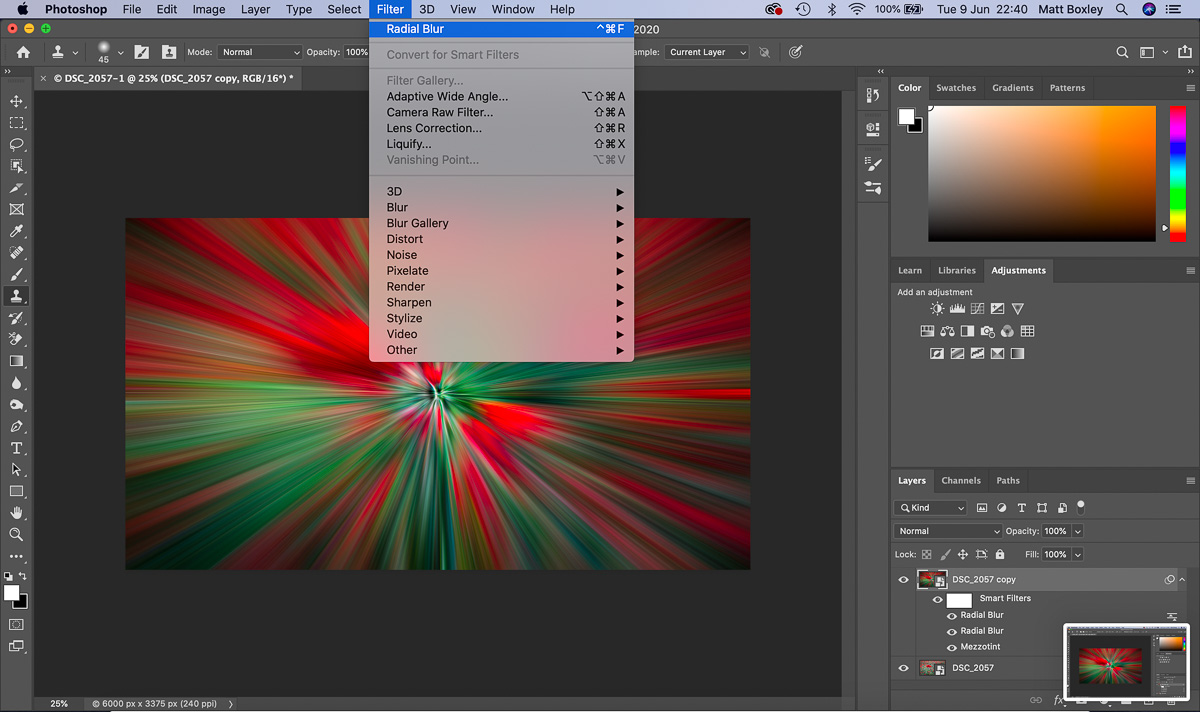
- Apply The Radial Blur Filter A 2nd Time
We need to make the blur stronger so we will apply the Radial Blur again with the same settings. We can do this by repeating the previous step, however as the Radial Blur filter was the last filter we used we can repeat this action quickly by selecting filter from the menu bar and selecting the top option Radial Blur.
- Apply The Radial Blur Filter A 2nd Time
Some people like to only apply the Radial Blur filter twice. I prefer the results when the filter is applied for a third time but this will be down to personal taste and the image you use. To apply the Radial Blur for a 3rd time we can repeat step 8 above.
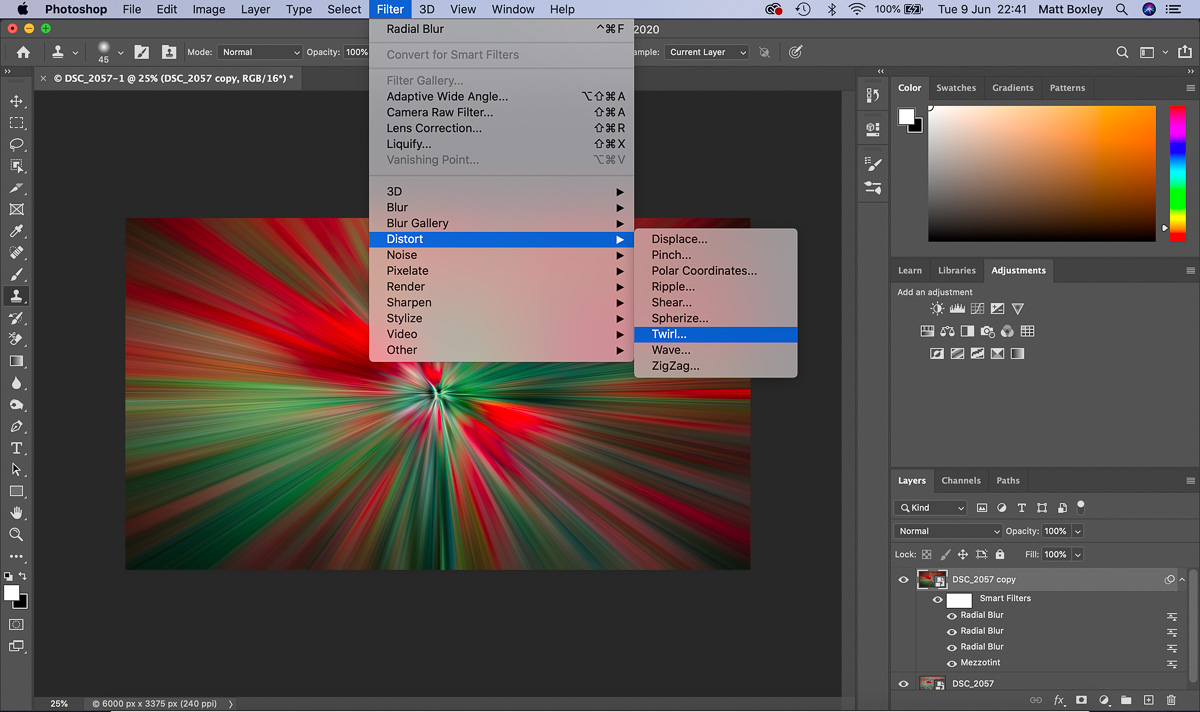
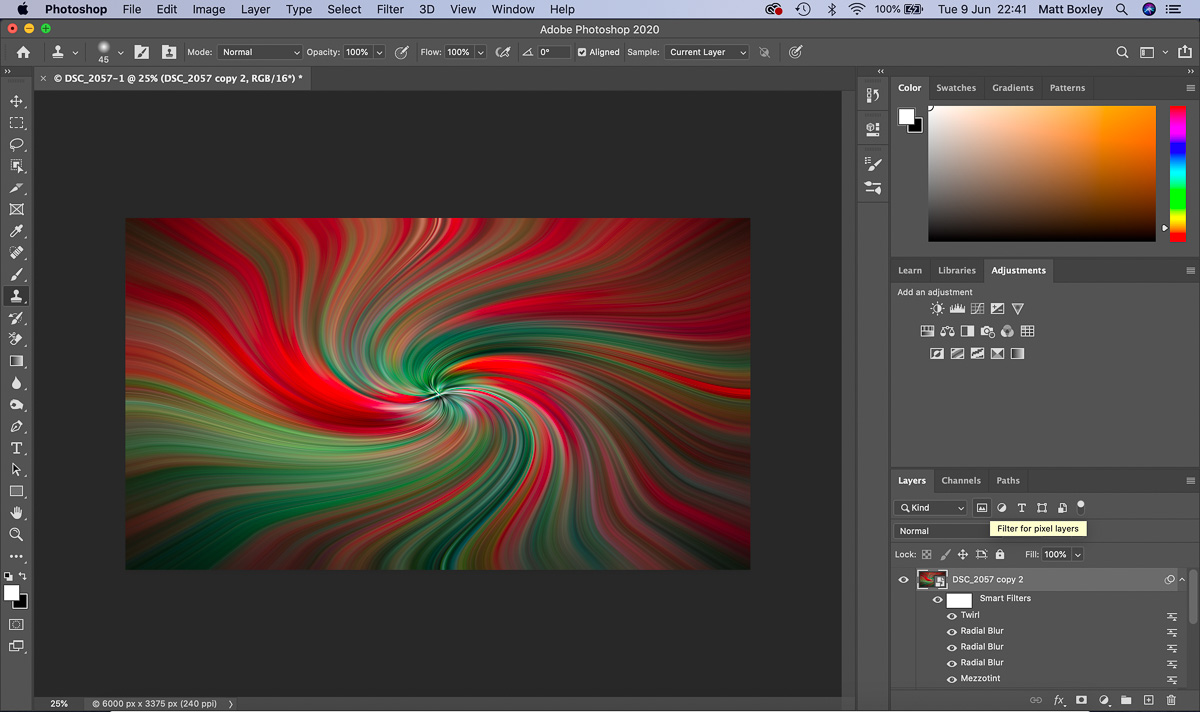
- Filter 3 – Twirl
The final filter we are going to apply to our image is Twirl filter. We can load the Twirl filter by going to the filter menu and selecting Distort and then Twirl. We will review and set the Twirl settings in the next step.
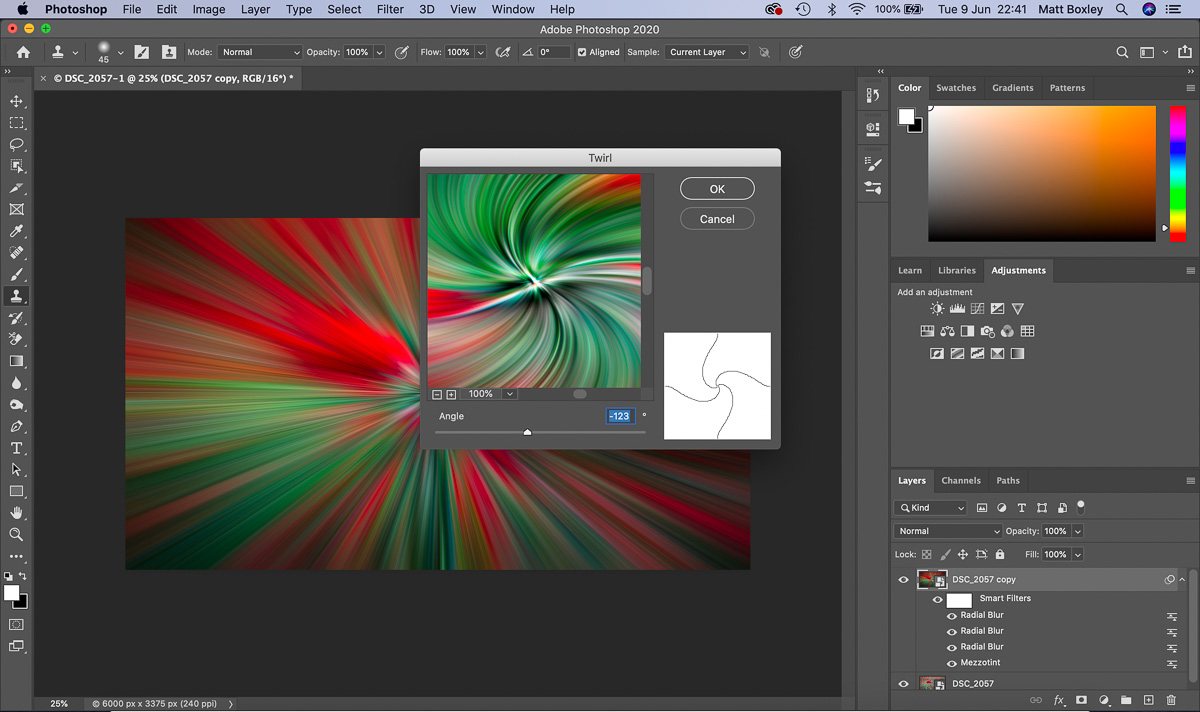
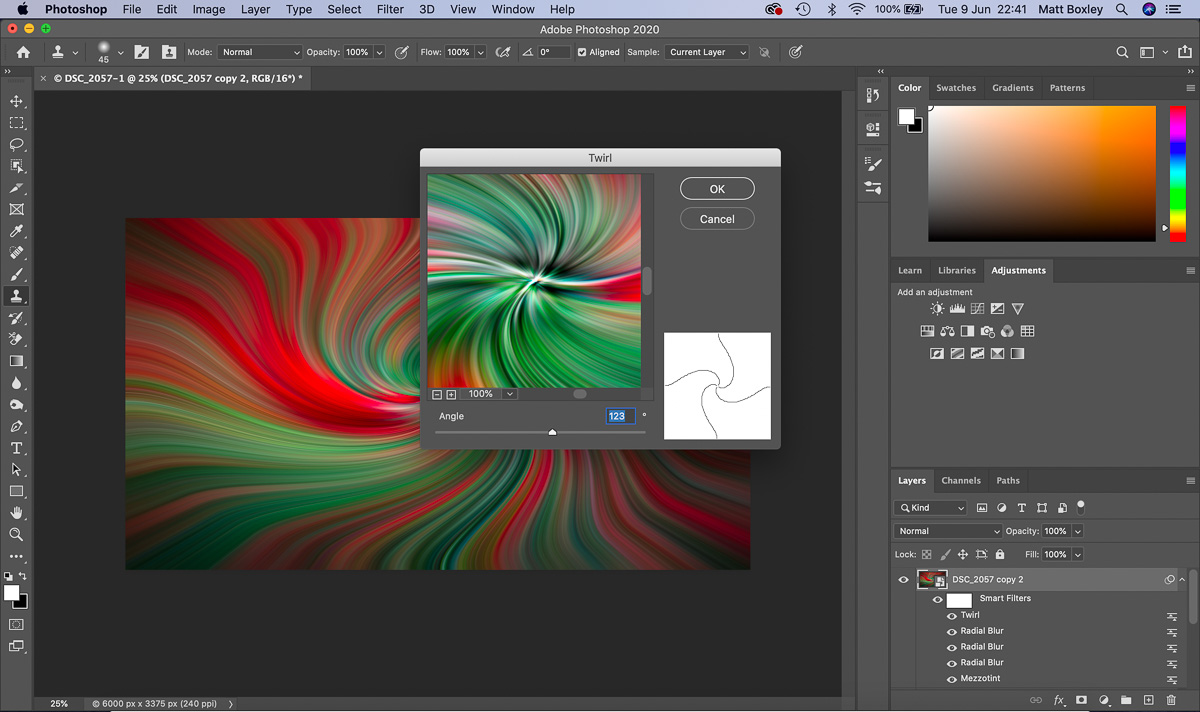
- Adjust The Twirl Filter Settings
The amount of twirl we are going to add is adjusted using the angle slider. I find a value of between 80 and 150 usually works best. To add an anticlockwise twirl to the image I have chosen a value of -135. If you are happy with the preview press the Ok button.
- Duplicate The Layer
To add symmetry to our twirl effect we need to re-apply the twirl filter. Before we can apply the clockwise twirl filter we need to duplicate the previous set of filters. To do this we can highlight the filter layer we want to duplicate by clicking on it in the layers pane and pressing command +J on a Mac or ctrl +J on a PC as we did previously in step 3.
- Adjust The Twirl Filter Settings
You should now see a set of duplicated filters in the layers pane. Double click the top twirl filter to open the twirl settings. To add a clockwise twirl we need to adjust the angle to a positive value equal to the value we selected in step 11. Press the Ok button to apply and update the filter.
- Blend The 2 Filter Layers Together
All our filters have now been applied. The anticlockwise filter is currently hidden underneath the clockwise filter so we cannot see it. To blend the 2 filters together and complete the symmetry we need to set a blend method.
In the layers pane we have a dropdown menu where we can select our blend mode. Ensure the top layer is selected and set a blend mode. I find the best results are achieved with Lighten, Darken or Pin Light. For this image I have selected Lighten.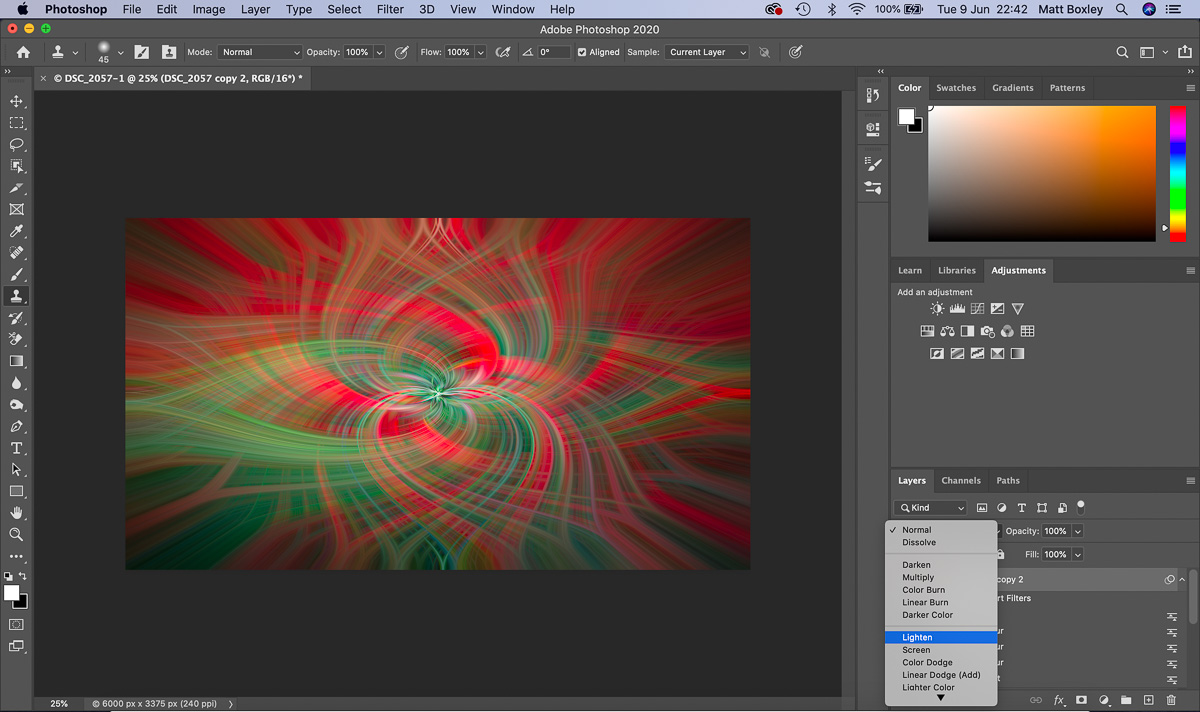
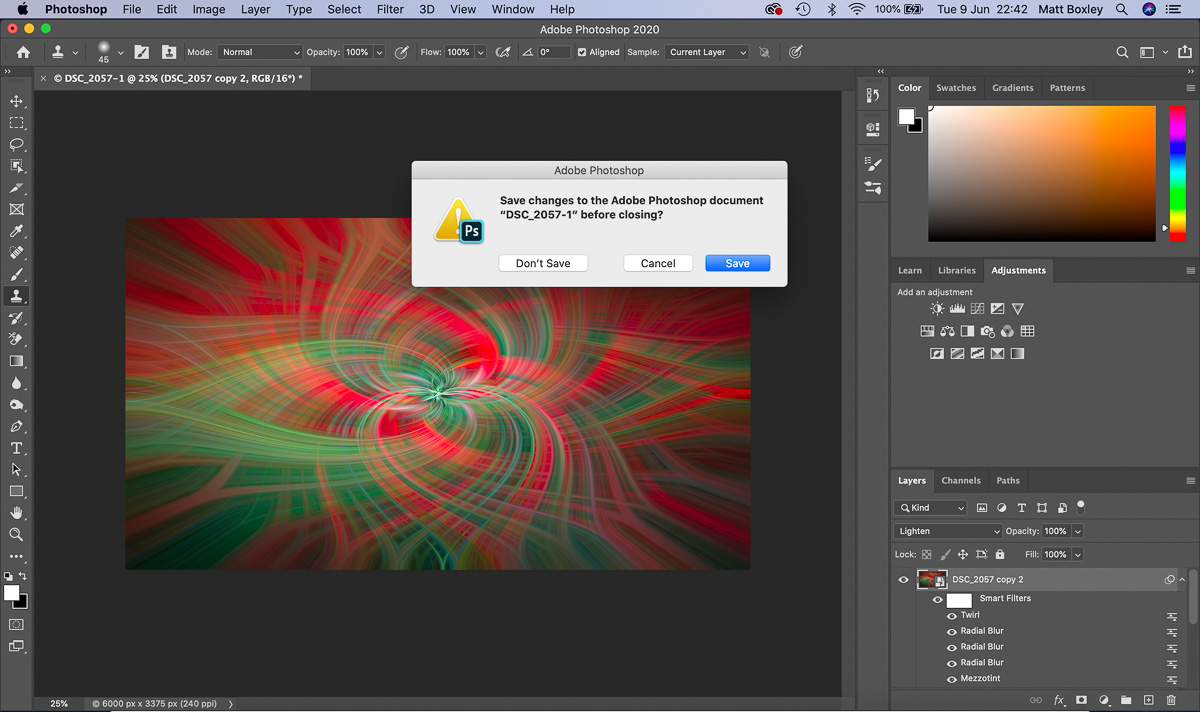
- Transfer The Image back to Lightroom
Our work in Photoshop is now complete and we can transfer the image back to Lightroom to complete our post processing, To do this we click the close button in Photoshop which will automatically open the save settings window. Click Save to complete the transfer back to Lightroom.
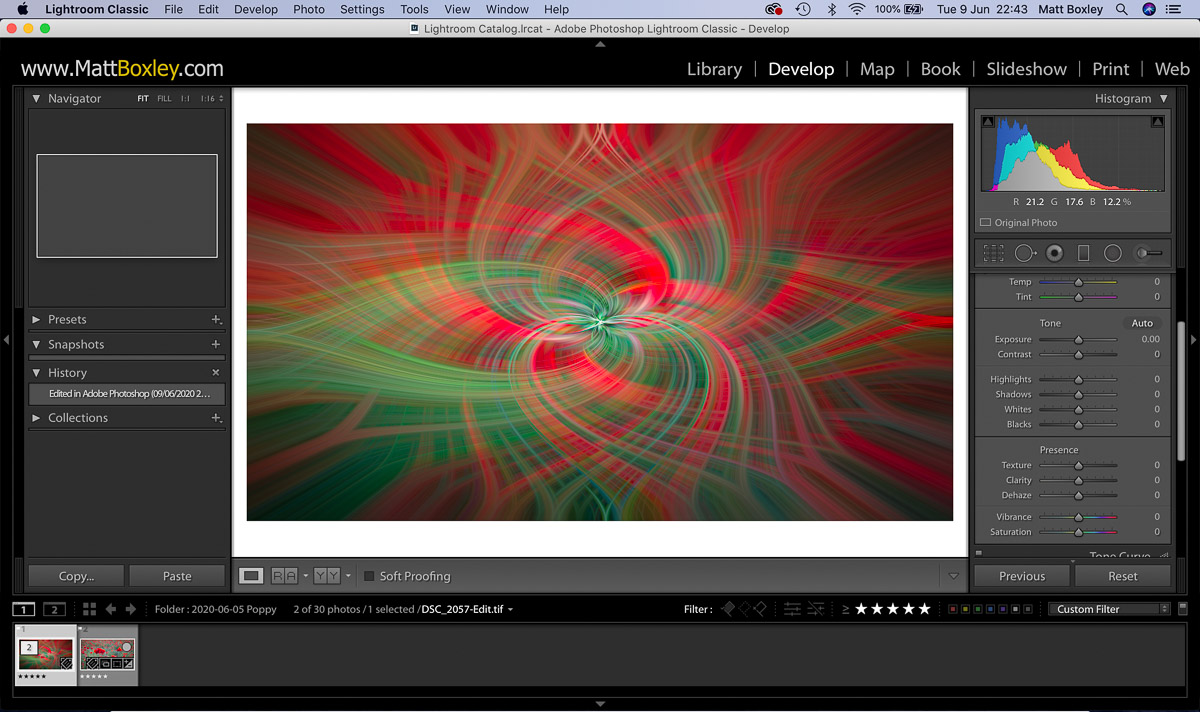
- Finish The Edit
Our image will automatically be added to Lightroom as a TIFF file. Process the image to your taste by adjusting the sliders to produce your desired image.
- Sit Back And Admire Your Amazing Abstract Twirl Art
Congratulations your abstract image is now complete and can be exported as you usually would with a regular photograph.
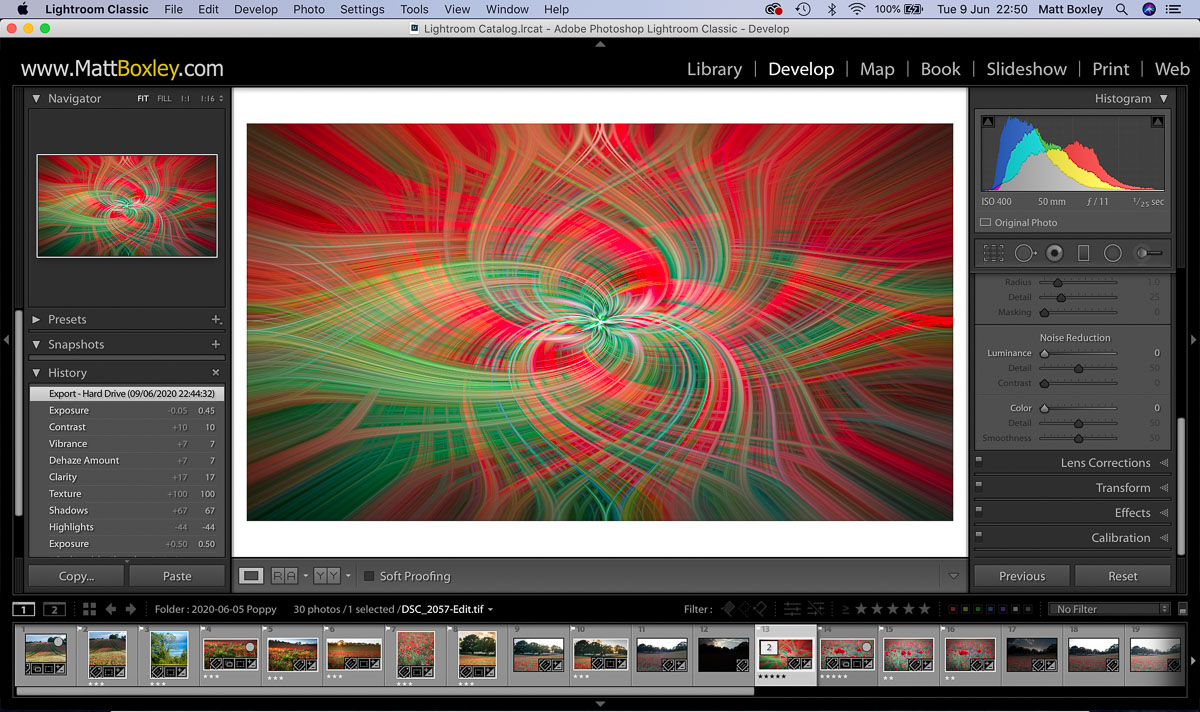
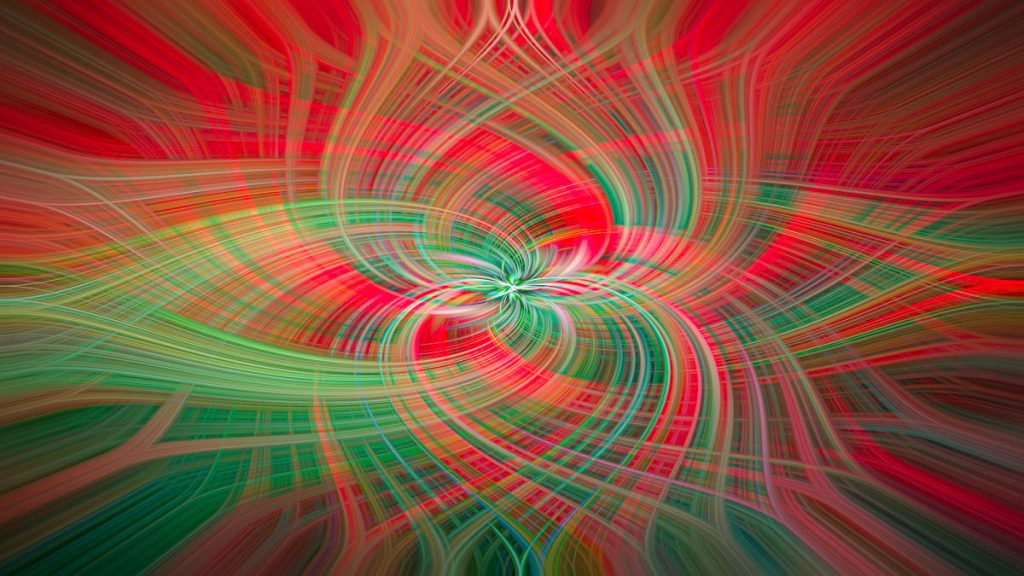
My Final Image
Continue To Experiment
Don’t be afraid to experiment and try different filter setting and blend modes. We used smart filters to create the twirl effect which is a non destructive method of editing. You can double click any of the filters at any point within the workflow to adjust your desired effect.

Feedback
I hope you found my twirl effect tutorial useful. I would love to hear your feedback and see the fantastic abstract images you have created. Feel free to leave a comment below or tag me in your twirl effect images on Instagram @mattboxley
Feel free to share the tutorial with your friends and contacts, this will allow other photographers to develop their own photoshop skills and create wonderful abstract images.
Sign Up For My Newsletter
Be the first to hear about my latest adventures, new blog posts and photography projects.
If you change your mind you can unsubscribe at any time.