Quite a few beginner photographers find learning the art of digital photography a daunting task. After all if you have never picked up a camera there’s a lot to learn. Understanding photography jargon or the lingo as it is sometimes called is one of the first things you will want to master. Likewise, a good understanding of photography related jargon will give you an excellent footing in learning the craft. If we do not understand photography jargon it can easily sound like an experienced photographer is speaking a different language. In this post I will share several photography words and phrases which will allow you to understand a conversation and participate with confidence within the photography community.
Just so you know, this page contains affiliate links and as an Amazon Associate I may earn a commission from qualifying purchases at no extra cost to you.
Aperture
Aperture is one of the most important photography terms you will want to understand. In simple terms aperture is a variable sized opening within a lens. The aperture blades inside your lens open and close to regulate the amount of light reaching onto the cameras sensor. The size of the aperture or opening in the lens is often referred to as an f-stop. A wide open aperture such as f/1.8 (low number) will allow considerably more light to reach the image sensor compared to a narrow aperture such as f/22 (high number). Aperture along with ISO and Shutter Speed form the “Exposure Triangle”. Aperture is also used to control our depth of field or how much of an image is in sharp focus. (See Below)
Aspect Ratio
Aspect ratio refers to the relationship between the height and width of an image. Most DSLR’s and mirrorless cameras have an aspect ratio of 3×2. You may also see this written as 3:2. This means the image width is one third larger than the image height. A square image would have an aspect ratio of 1:1 and a panoramic image would have a much longer length compared to its height such as a ratio of 3:1.
Blue Hour
Blue hour is the period of time approximately twenty to forty minutes before sunrise or after sunset, when the sun is at a significant depth below the horizon. The sky will be filled with a cool blue hue and cold colour tones before falling into complete darkness.
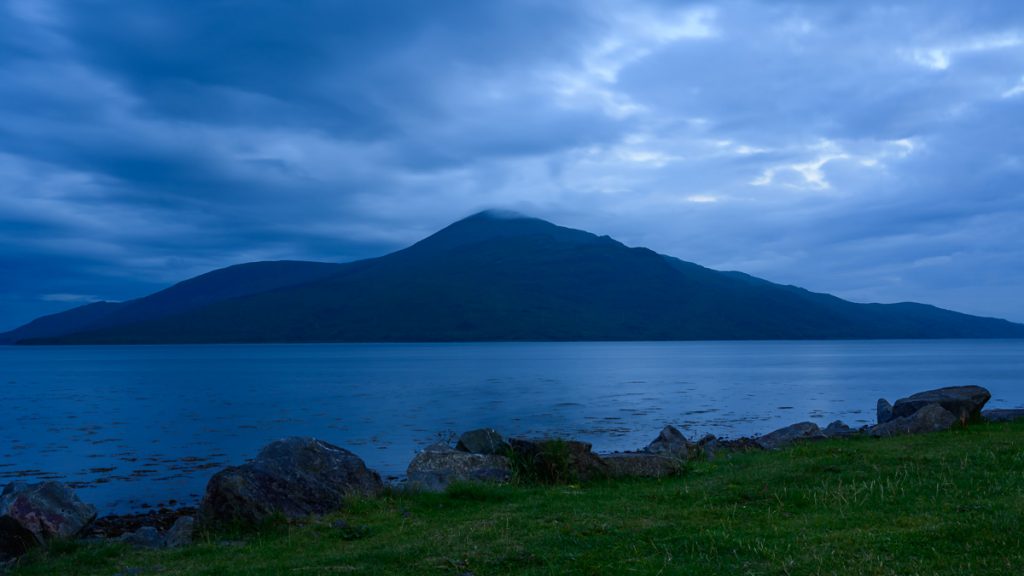
30.0 sec exposure at f/16 ISO 100
Bokeh
Bokeh is a word that derives from the Japanese language meaning blur. Therefore In photography bokeh refers to the out of focus or blurry parts of an image. Bokeh is usually used to isolate a subject within a busy scene because it is a great way to disguise messy or distracting backgrounds. Bokeh is better suited to portrait and macro photography and is rarely incorporated into landscape photography images.
Bracketing
Bracketing is a technique used by photographers where a number of images are captured of the same scene using different camera settings. The photographer then has multiple images to choose from and combine to make the best possible image. Bracketing is becoming a lesser used technique as technology advances and camera sensors are able to handle a wider dynamic range. (See also Exposure Blending)
Bulb Mode
Bulb mode is a shutter speed setting which allows us to use shutter speeds in excess of 30 seconds. The mode is often used in conjunction with a shutter release cable. When using this mode the cameras shutter will remain open for as long as the shutter release button is depressed. Bulb mode is heavily used in dark situations for instance photographing the night sky.
Chromatic Aberration
Chromatic Aberration is a failure of a lens to focus all colours to the same point. There are two different types of chromatic aberration. Longitudinal (axial) chromatic aberration and the lateral (transverse) chromatic aberration. Chromatic aberration can present itself as a blurring or colouring around edges of an image or between high contrast areas. It is usually seen as a red, green, blue, yellow, purple, or magenta imperfection. The latest post processing software such as Lightroom has built in correction tools to reduce and remove the effects of Chromatic Aberration.
Clipping
Clipping in basic terms is when the intensity of light falls beyond the minimum or maximum intensity that can be handled by the camera sensor.
- When we clip the whites it’s usually due to over exposure. We often refer to this as “blown out highlights”. The clipped area will be rendered as pure white pixels with no detail.
- Clipping due to underexposure will appear as pure black pixels. Again these pixels will have no detail.
- It is usually very difficult if not impossible to recover any detail from clipped pixels within post processing.
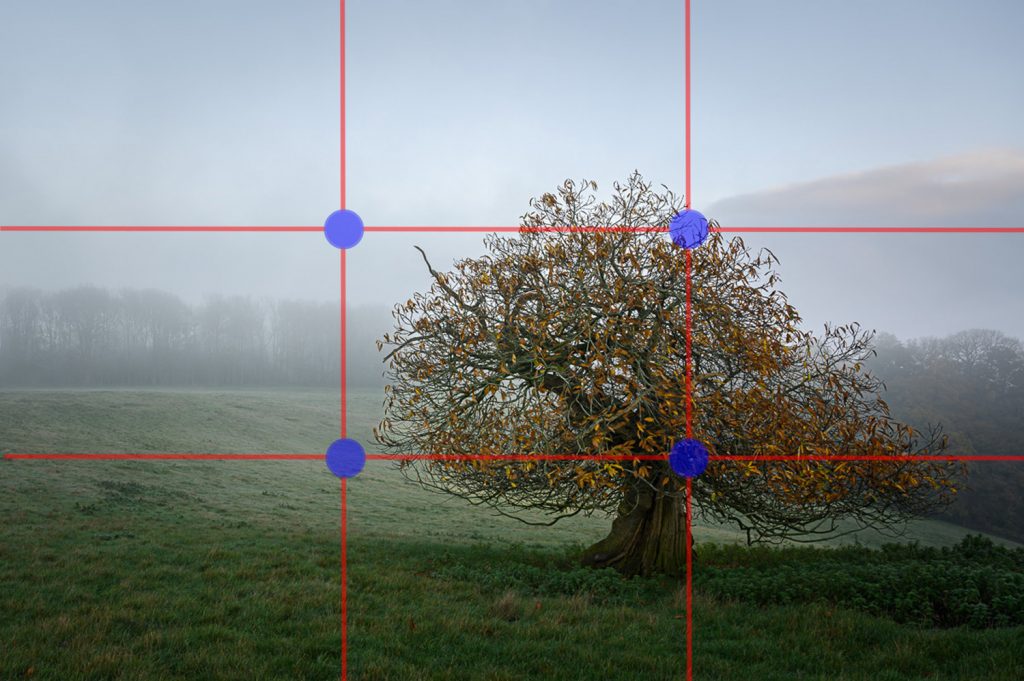
Composition
Composition in short is the arrangement of elements within your photograph. Every time we make a picture we take a conscious decision on what to include or exclude from our photograph. We also decide where to place a particular element within the frame. Studying and Improving your composition will have the greatest impact on becoming a getter photographer. In conclusion a well composed image will often differentiate a good photographer from a great photographer.
Composition is a broad subject. There are many rules and guides to consider such as the rule of thirds, leading lines, symmetry and patterns, using frames and much much more…
Composite
Composite images are made up of two or more photographs. In essence elements of each images are combined to create a single photograph. A photograph where the sky has been swapped or replaced would be considered a composite image.
Depth Of Field (DoF)
As a landscape photographer you will want to learn all about depth of field. DoF as it’s also referred to is the distance between the closest and furthest points in a photograph that appear to be acceptably sharp. Above all landscape photographers will aim to achieve front to back sharpness in an image, maximising depth of field. A portrait photographer in comparison may want the complete opposite choosing to throw the background completely out of focus.
Dynamic Range
Dynamic range refers to a camera’s ability to record the darkest and lightest (shadows and highlights) details at the same time. The Dynamic range of a camera sensor is measured in stops of light. Older cameras will typically have a dynamic range of around 8 stops whilst newer DSLR and Mirrorless cameras may achieve a range of around 15 stops. In comparison the human eye can see up to 20 stops of dynamic range.
EXIF
EXIF is an acronym for Exchangeable Image File Format and is a standard that defines specific information related to an image. Typically EXIF data includes data such as shutter speed, ISO, aperture, metering modes, if a flash was fired, date and time, GPS location data, copyright information and a whole host of other information.
Exposure
Exposure is the amount of light that reaches you camera sensor or film. As your exposure changes so will the brightness or darkness of an image. There are two fundamental types of exposure the first being a balanced exposure where we zero our light meter and the second being a creative exposure where we may under or over expose an image for creative expression.
Exposure Blending
Exposure blending is where we shoot two or more images at different exposure values and combine them together to make a single image. An example of its use would be where the sky is much brighter than the foreground. We could take two images one exposed for the sky and the other exposed for the foreground and then exposure blend the two images in software such as Photoshop to create a single image.
Exposure Compensation
Modern cameras are intelligent tools and like to think they know what’s best for an image. After all isn’t that’s why we have fully and semi automatic modes? Whilst automatic modes have their uses the camera will always choose the exposure based on a pre programmed algorithm. Exposure compensation is an override function that will allow us to brighten or darken an image to achieve our desired exposure. The setting is extremely useful when photographing subjects such as snow or white wedding dresses.
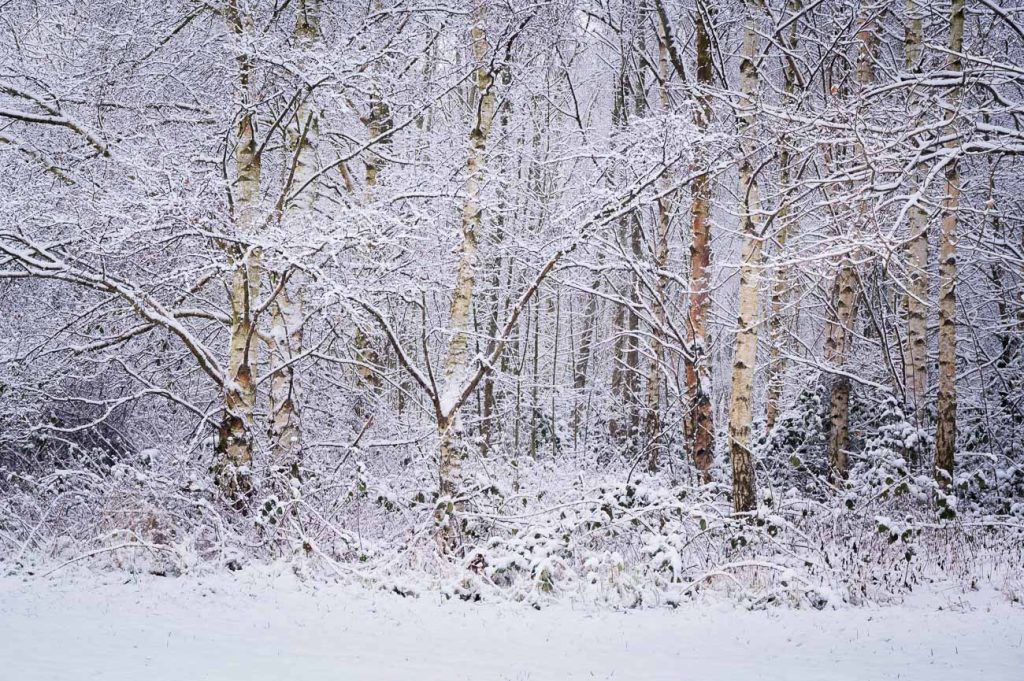
The cameras automatic light meter is often confused with snow scenes and will usually output whites as grey.
Exposure Triangle
The exposure triangle explains the relationship between ISO, Shutter Speed and Aperture. The three elements work together to create exposure. If we change one variable at least one of the other settings must be changed to achieve the same exposure. For example if we stop down our aperture we must either use a slower shutter speed or higher ISO to achieve the same exposure. Learning the exposure triangle will be your first step into understanding exposure and shooting in manual modes.
Focus Stacking
Have you ever taken a photo and been disappointed that it didn’t get front to back sharpness? Focus stacking is where we can combine several images each being focused on different area of a scene. Focus stacking is very common practice in landscape and macro photography where it may not be possible to capture the desired depth of field in a single photograph. The captured images will need to be stacked in post processing software such as Photoshop to create a single sharp image.
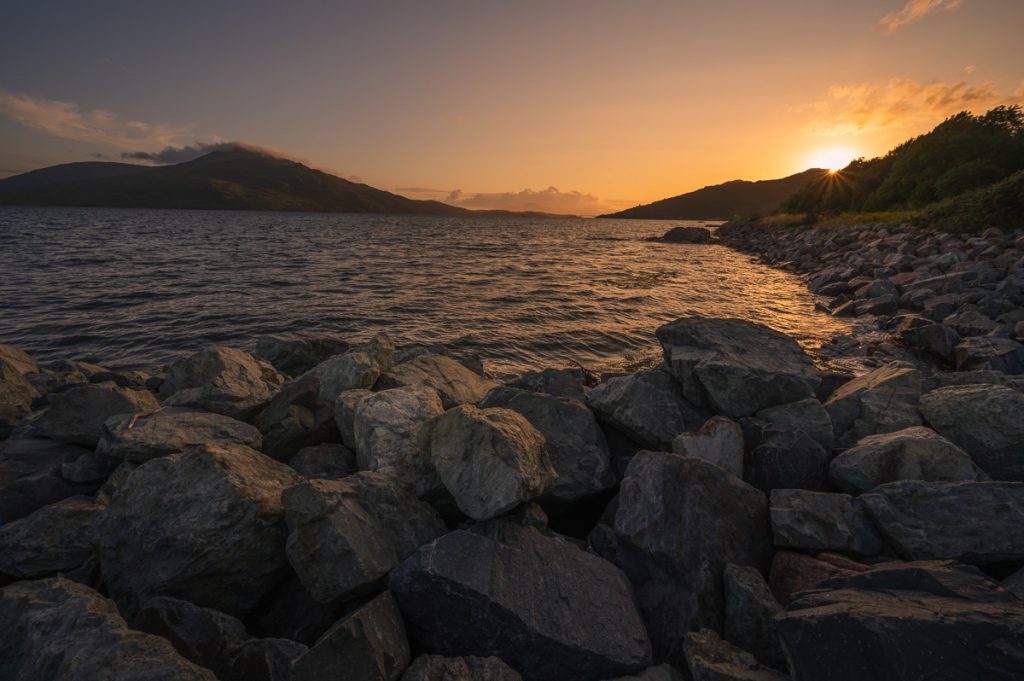
Golden Hour
A landscape photographers favourite time of day is said to be during Golden Hour. The Golden Hour is the first hour of light after sunrise and the final hour of light before sunset. The exact definition of the Golden Hour is the period of time where the sun is between 4° below and 6° above the horizon
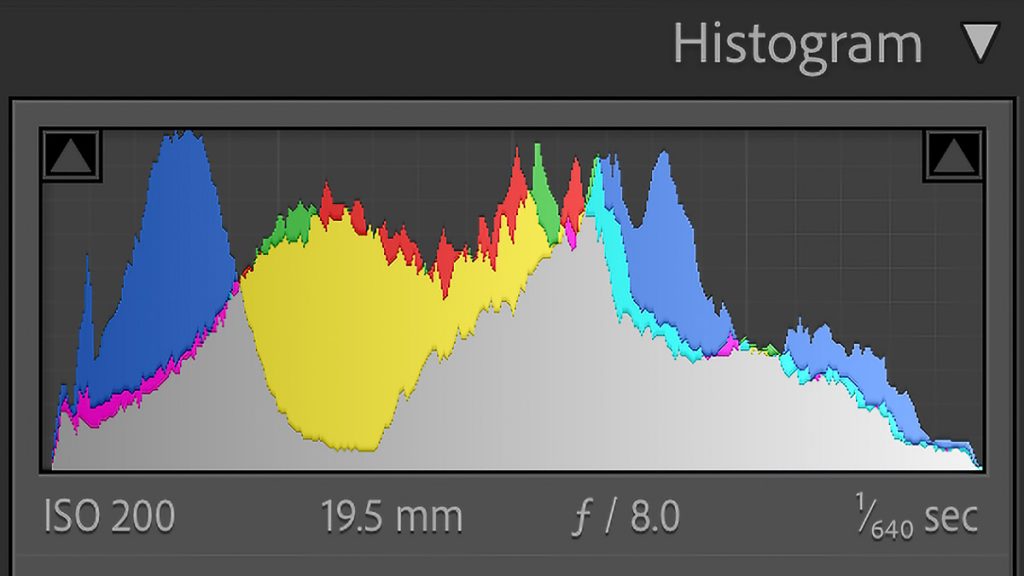
Histogram
A histogram is a visual representation in the form of a graphical chart to show tonal values within an image. Darker tones are displayed on the left hand side of the histogram and similarly brighter tones on the right hand side. The tones found in the middle of the histogram are known as mid-tones. The histogram is very useful in reviewing exposure and therefore is a valuable tool in ensuring highlights are not over exposed.
Hyperfocal Distance
Hyperfocal distance in its most basic term is where we can focus to achieve what is known as front to back acceptable sharpness. The location where we need to focus is part way through an image between the foreground and background. To clarify the exact position of our focus point will depend on the focal length of our lens, our chosen aperture and what is known as the acceptable circle of confusion.
The easiest way of knowing where to focus is by using a hyperfocal distance chart or by making use of a photography application on your phone. The app I recommend is PhotoPills because you can fill in your camera model, lens and aperture to obtain the hyperfocal distance.
ISO
ISO is your camera sensors sensitivity to light. Similarly if you shoot film ISO refers to the film speed. Shooting at your cameras native ISO will produce the best quality image. If we increase our ISO to elevated values such as ISO 3200 or above will start to introduce grain on film or digital noise on a digital camera. The best way to think of ISO is as an amplifier for your camera sensor.
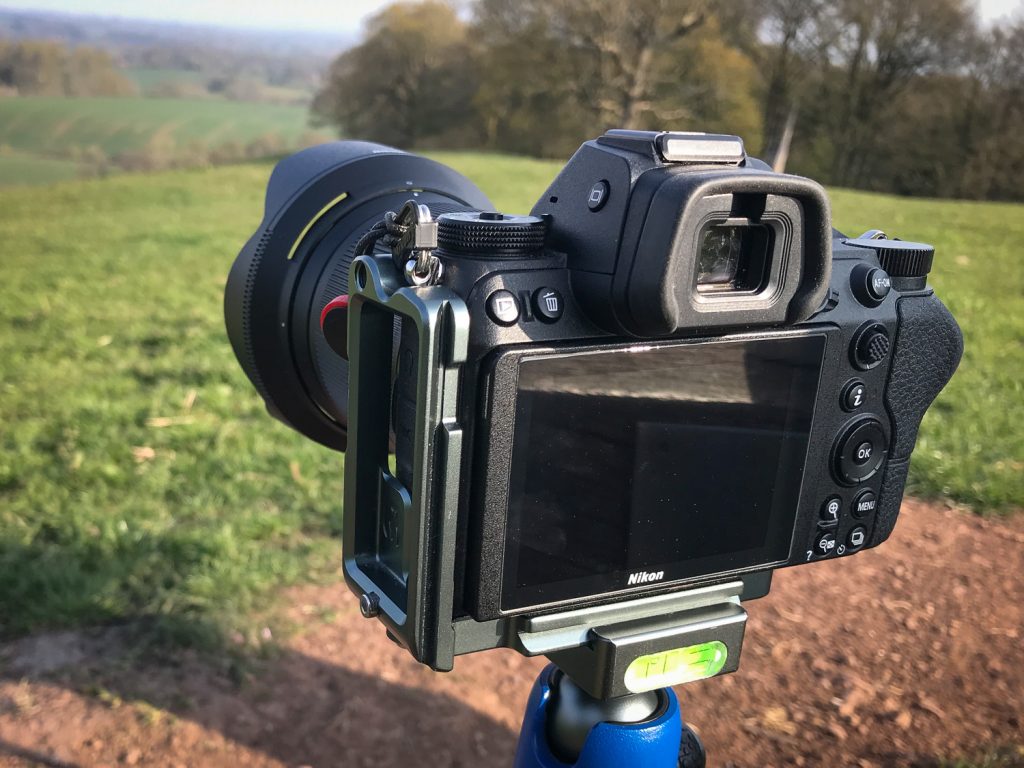
L-Bracket
An L bracket is an accessory that wraps around the side of your camera and replaces a traditional quick release tripod plate. The primary benefit of an L bracket is to allow you to quickly and easily switch between horizontal and vertical orientations.
Lens Flare
Lens flare happens when light is scattered or flared in a lens causing undesirable and unwanted artefacts in an image. Modern lenses have advanced coatings to reduced the chance of experiencing lens flare. Lens flare is subjective and frequently used as an artistic feature in photographs and motion pictures.
Live View
Live view lets you view your composition on the cameras rear LCD screen. As a landscape photographer I use live view considerably more than I use my viewfinder. The larger display makes composing images so much easier especially when using a higher or lower perspective.
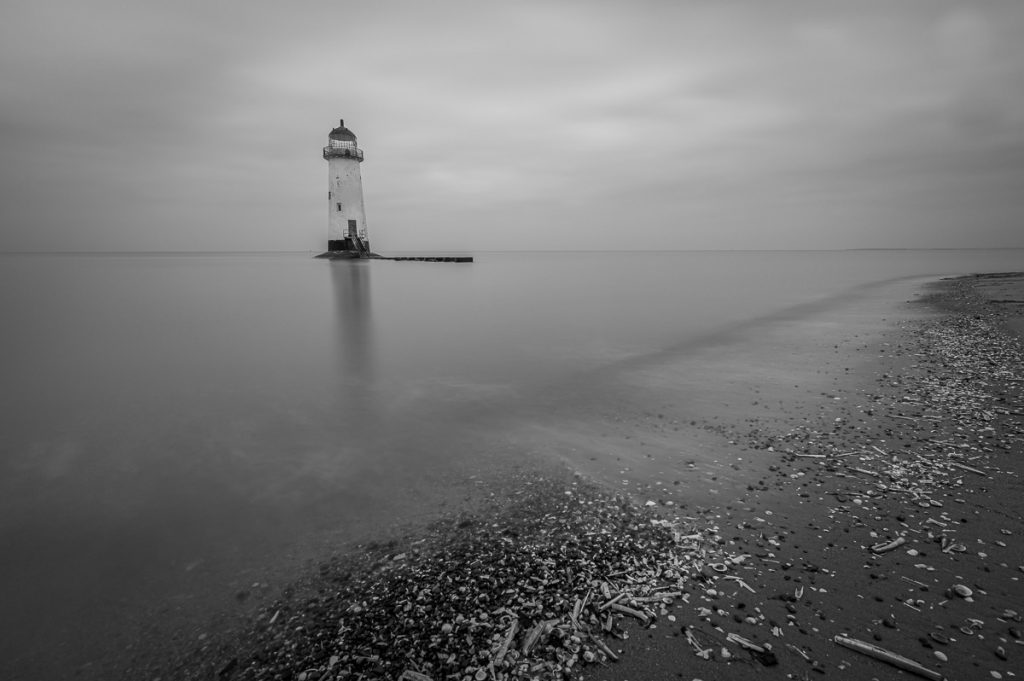
Long Exposure
A Long exposure is when the camera shutter remains open for a considerable length of time. Apart from low light photography, long exposures are frequently used to create artistic and creative images. Long exposures are regularly used to capture moving subjects such as light trails, clouds and flowing water.
Neutral density filter (ND)
I use Neutral density filters to extend shutter speeds in bright light. ND filter come in a range of different strengths designed to block out a defined quantity of light. Think of an ND filter as a pair of sunglasses for your camera.
Orton Effect
The Orton Effect is a technique that was developed by Michael Orton in the 1980s. The effect is one of the most popular post-processing techniques used amongst landscape and woodland photographers. The Orton Effect adds a soft glow in addition to introducing a painterly look to an image. The original effect is created by sandwiching several pieces of film together. In todays digital age the effect can be replicated in several different ways by using post processing software.
Panorama
Landscape photographers love to make a panoramic image. Pano for short is a wide angle representation of a scene. Panoramic images have one side considerably longer than the other. Panos are created by capturing a series of photographs across a scene with each image overlapping the next by around a third. The set of images can then be processed and stitched together in software such as Lightroom or Photoshop.
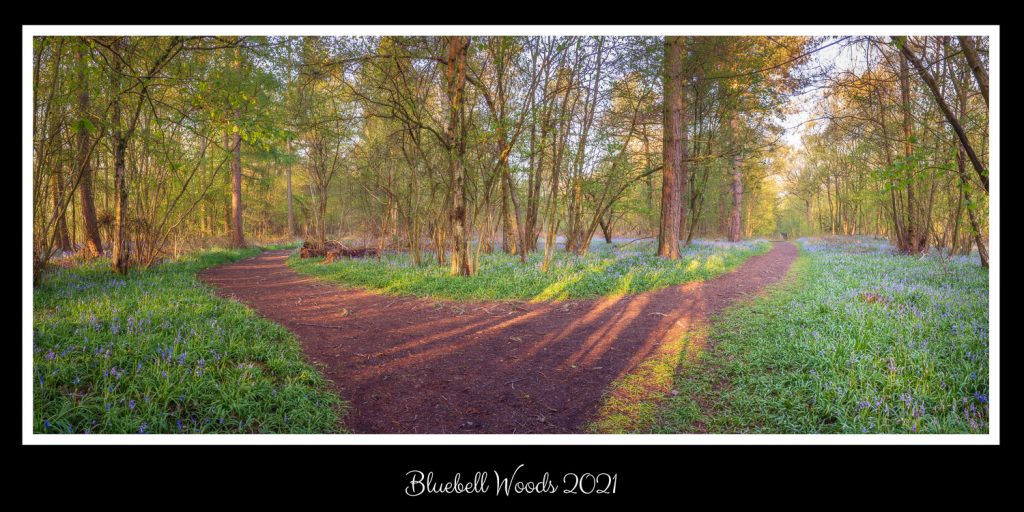
This panoramic image is a combination of 6 individual images stitched together in Lightroom
Polarising Filter
Polarising filters are one of the most essential filters used by a landscape photographer. The filter sits in front of the lens and is used to darken skies, manage reflections and suppress glare found on the surface of water. A circular polarising filter works best when angled 90 degrees to the sun and the resulting effect can be maximised or minimised by rotating the front element of the filter. Find out more by reading this blog post.
Raw File
A raw file is a proprietary file format that records the maximum amount of data captured by a cameras sensor. The file true to its name contains raw data and will need to be processed by software to develop the image. Raw files will lack contrast and appear flat when first viewed. A raw file allows considerably more control during image manipulation compared to a JPEG file.
Shutter Release
The shutter release is the button that you depress to take and record the image. The button is usually located on the top right hand side of a digital camera.
Shutter Speed
Shutter speed is part of the exposure triangle (see above). We can use shutter speed to create artistic images either by freezing motion or capturing movement. Shutter speed also impacts one an images sharpness. If a shutter speed is too low the image may be blurry from camera shake. This is especially true for longer focal length lenses.
Stitching
Stitching is a post processing technique where 2 or more images are joined together to make a single image. (See also Panorama for further detail)
Time Lapse
Time lapse photography is a specialist area of photography where a large number of images are captured at regular intervals. The images are converted into a video timeline to give the impression of time passing quicker than reality.
Vignette
A vignette is the intentional darkening of the periphery of an image. The aim of the darkening is to draw the viewers attention to the centre or focal point of an image. Unwanted vignettes can sometimes be introduced into our images from poor camera settings, using the wrong lenses or by using smaller than required filters.
Thanks for Reading
Thank you for reading. I hope you found the post informative and you now have a better understanding of photography jargon. If you found the content useful feel free to leave me a comment below.
Interested in landscape photography?
Why not check out another post where I tell you about the best 5 accessories for landscape photography
Sign Up For My Newsletter
Be the first to hear about my latest adventures, new blog posts and photography projects.
If you change your mind you can unsubscribe at any time.