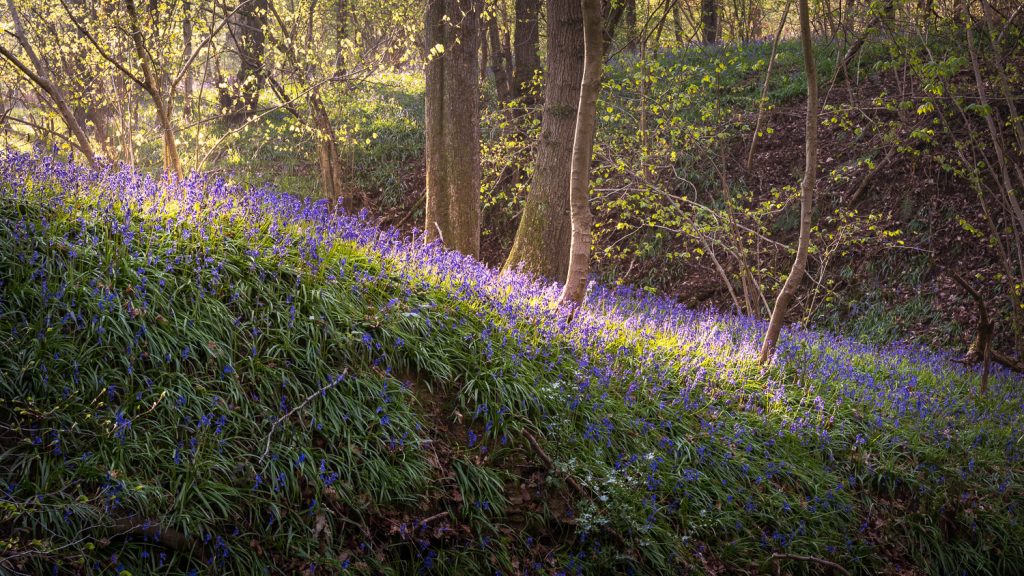
Spring has finally arrived providing us with a variety of colourful flowers and carpets of woodland bluebells. Did you know the UK is home to over half of the worlds population of bluebells. This means we don’t have to look far to find a magical carpet of these little blue and purple flowers amongst our countryside. In this post I share a selection of bluebell images and provide my best tips to better your woodland photography.
Just so you know, this page contains affiliate links and as an Amazon Associate I may earn a commission from qualifying purchases at no extra cost to you.
You can always tell when bluebell season is upon us as social media sites get flooded with images very quickly. #bluebells. This year I decided it was time to create my own set of images. Who knows maybe I can possibly use one for next years calendar.
I have never really tried to photograph bluebells before. If I look through my back catalogue you will find very few pictures of bluebells. In fact the only two images I managed to find in my Lightroom catalogue were both accidents. Not good accidents either, so the images will most likely never see the light of day.
If you are interested in landscape photography take a look at my recent post 5 Must Have Accessories For Landscape Photography They could be a game changer and just what you are looking for to improve your own photography.
When Do Bluebells Flower?
Bluebells are classified as perennials which means they will come into flower annually. Depending on where you are in the UK these little blue flowers start to form around the middle of April. They often reach full bloom before the end of May so as you will apreciate we only have a short window of opportunity to create our images. It’s worth noting that the milder the weather the earlier bluebells will form. Therefore we need to ensure we keep an eye on the countryside to find the best photographic opportunity. Visit a woodland too early and the display will be patchy and uninspiring. Visit too late and flowers will have drooped or even worse trampled or crushed.
How To Find Bluebells?
Luckily for those of us in the UK bluebells are reletively easy to find. Traditionally they can be found in our older woodlands however they will grow in a variety of places including local woodland, fields and gardens. Within our woodlands bluebells tend to grow under the canopies of oak and beech trees prior to the tree canopies becoming dense and blocking the light.
There are several online resources to help you find a local woodland including the Woodland Trust’s website. The site is home to a huge list of woodlands in the uk. Their handy woodland finder tool will tell you where to find your local woodland and what you can expect to find inside them.
When Is the Best Time To Photograph Bluebells?
There is a very short window of around two weeks when the bluebells will be at their prime. I would recommend visiting your local woodland weekly from mid April to allow you to gauge the best time to visit with your camera.
Deciding what time of day to capture your photographs will be an important decision. Bright sunlight will make the blue and purple flowers appear bleached out making capturing a realistic colour tone very tricky. For the most accurate colour replication I would suggest an early morning or late afternoon. Both these times the elevation of the sun will be a lot lower and the quality of light will usually be less harsh and more appealing.
I personally prefer shooting at sunrise. I find the early morning light is often softer and woodlands are usually quieter. After all sunrise is pretty early in April and May. Most people do not tend to wake up this time of year until the sun is well above the horizon. That said don’t let this put you off taking photographs in the mid day sun. The canopy above will help to defuse the bright sunlight whilst allowing you to capture shadows that are being cast by the towering trees.
The Best Lens For Bluebell Photography
A standard mid range zoom lens such as an 18-105mm or 24-70mm lens can be a perfect choice for everyday woodland photography. If you don’t have a mid range zoom lens don’t let this put you off. Compact cameras, mobile phones and budget friendly mirrorless/dslr’s will also capture amazing images.
- Longer focal lengths will help compress the scene and effectively push the flowers closer together, making them appear denser than shooting with a wider angle lens.
- Shorter focus lengths will allow you to capture the wider scene and will make the bluebells appear slightly wider apart (less compression).
- Prime or fixed focal length lenses are very sharp however you have to zoom with your feet. This may not be possible without walking on the woodland flowers meaning you cannot get close enough to your subject.
- Macro lenses will allow you to capture all the little details and make your subject appear larger in the frame. A true macro lens will render the image 1:1 on the cameras sensor. Cheaper lenses that offer a macro function are not true macro lenses and the magnification rate will be slightly less. Macro lenses can be quite an expensive outlay. If you want to experience close up photography without a huge expense consider purchasing a set of extension tubes.
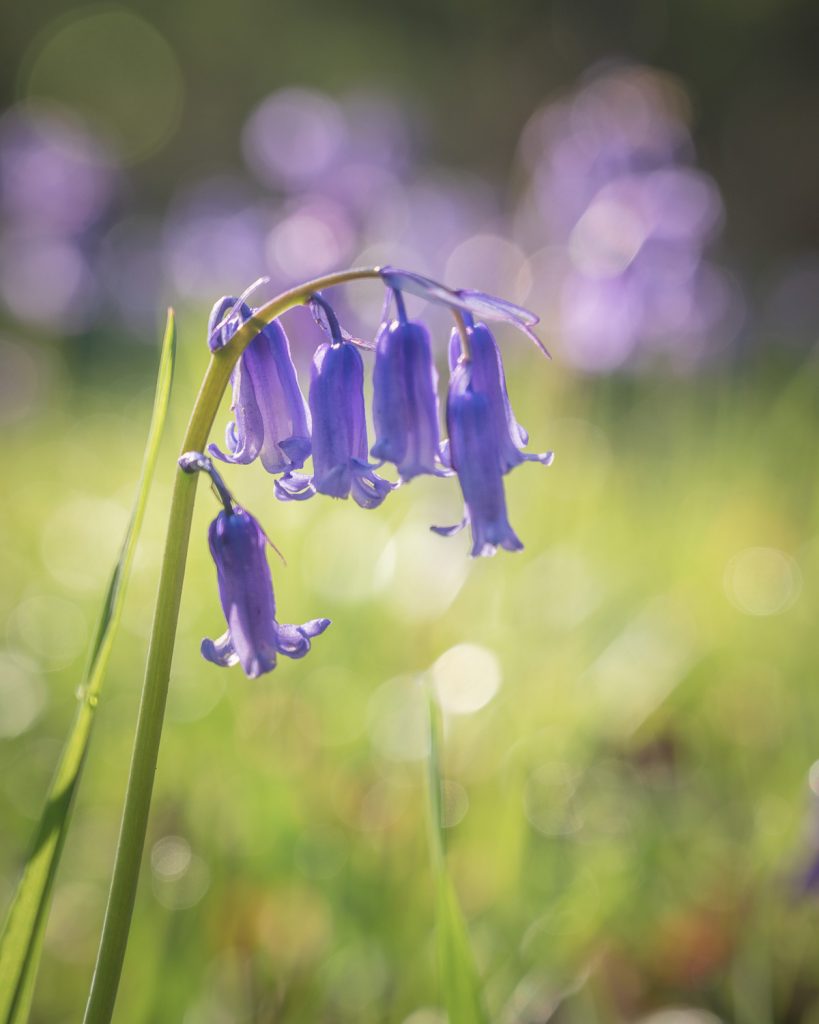
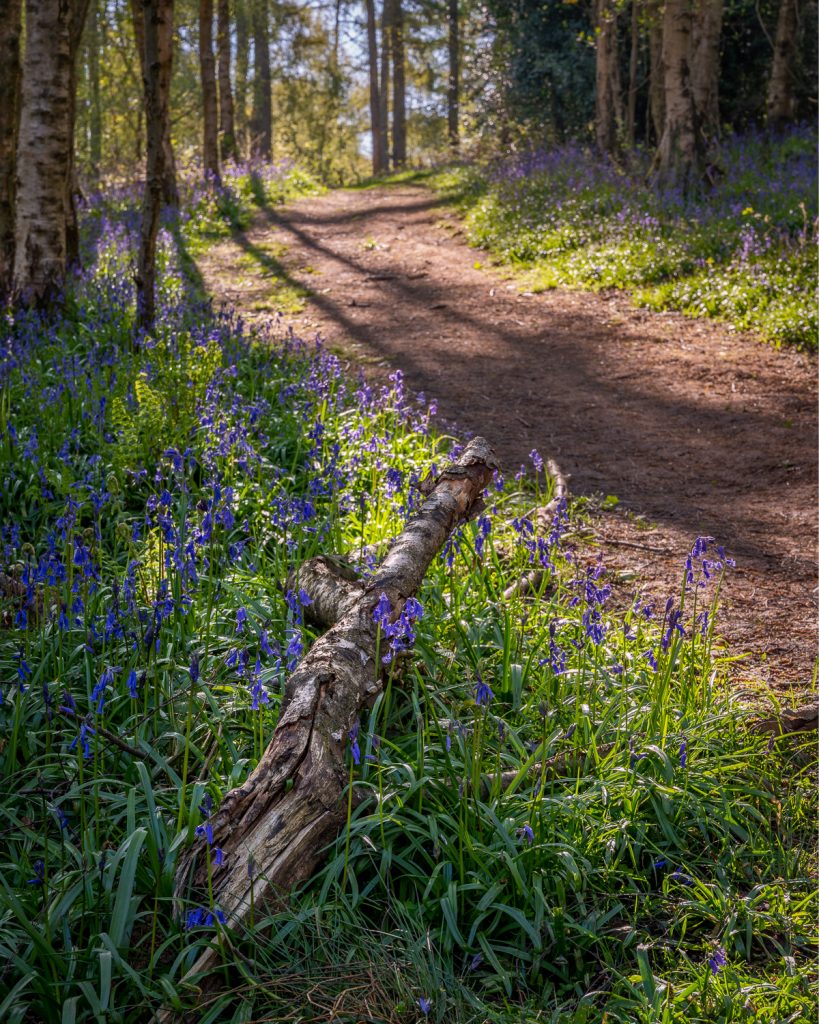
Capture the details
Wide angle scenes with carpets of bluebells for as far as the eye can see may be the kind of images you are looking to create. Don’t let this deter you from capturing intimate details. For the above shot my camera was held very close to the woodland floor. I isolated the single stem of bluebell flowers by zooming my 24-70mm lens to its 70mm. Opening the aperture to my lenses widest setting of f4 achieves a narrow depth of field. The result is the subject being in focus and a lovely background of bokeh. This was my first time capturing bluebells with this technique and in hindsight I think I should have stopped the lens down to f5.6. This would help to increase the sharpness and depth of focus on the flower heads whilst still throwing the background out of focus.
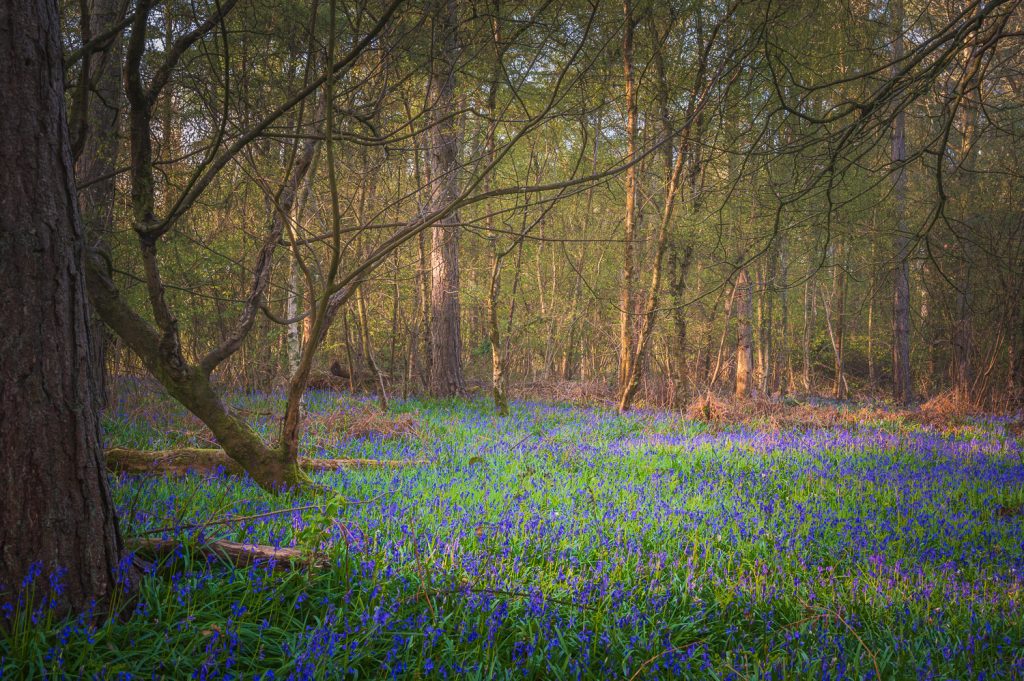
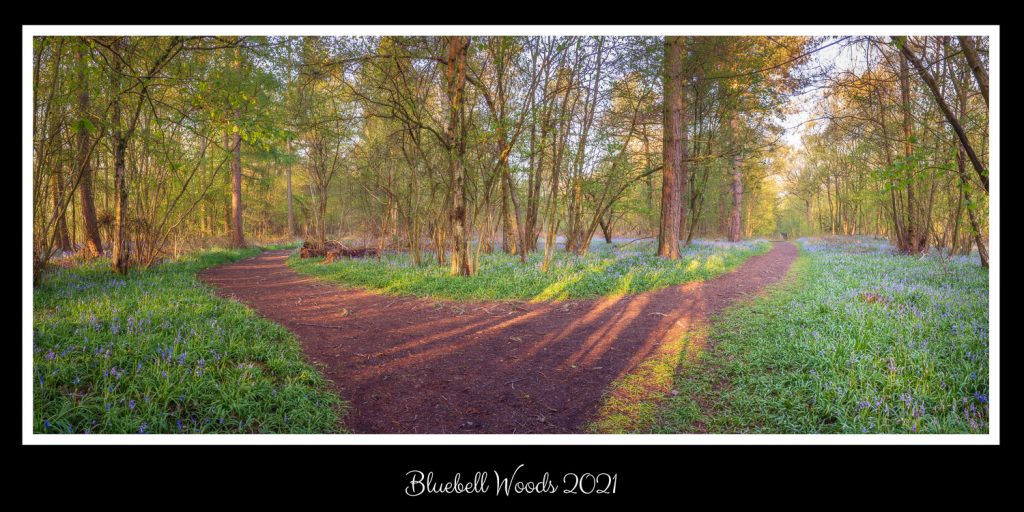
Shoot A Panoramic
The above image was captured with my 24-70mm zoom lens. Even at 24mm I couldn’t fit the entire scene into the frame without moving a lot further back. This would have introduced distortion to the image as well as capturing a lot more foreground and sky that I didn’t really want to include..
Shooting a panoramic image let me capture the scene I wanted. The panoramic image is made up of 6 individual images shot at 24mm which were stitched together during post processing. Let me know in the comments if you agree that the panoramic image is the better composition.
Improve Your Woodland Composition
I have mentioned before in other posts that composition is the most important factor to creating a better image. Some people will argue light is the most important factor, however a strong composition in poor light will still often be better than a poor composition in excellent light.
Improving composition is a huge subject which I will try to cover at some point in the future. There are many techniques which we can use however here are my 3 top tips to help you improve your woodland compositions.
Reduce or Remove Sky
I consider my best woodland images to be those where the is very little or no sky. Large areas of blue sky in woodland images can often be distracting adding nothing to a photograph.
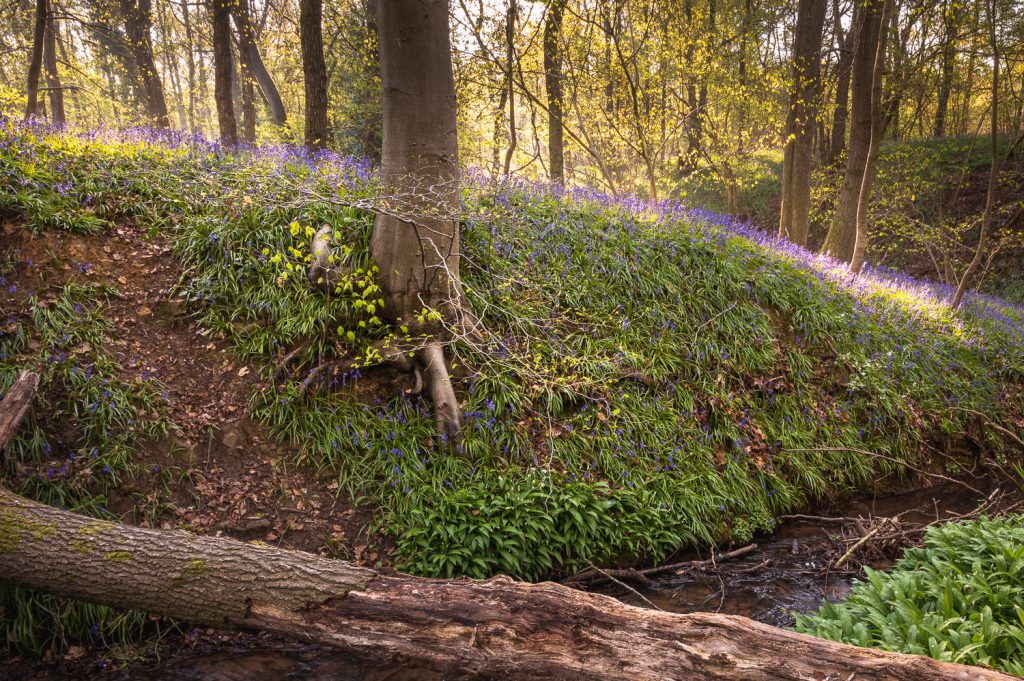
Look For Leading Lines
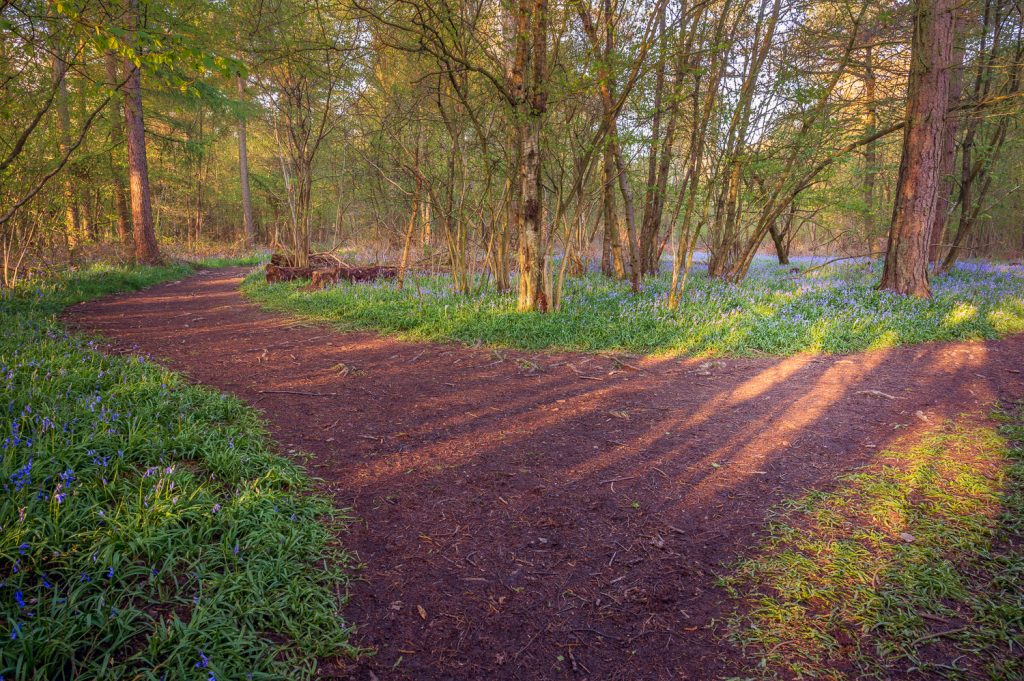
Lines can help to lead the viewers eye thorough an image. Walkways, paths and tracks are the most used leading lines found within a woodland. Be sure to look for the lesser obvious lines including shadows, streaks of light, changes in contrast, fallen trees and branches. I am sure there are many more so do not be afraid to experiment.
Use Brightness To Draw Attention
The human eyes are naturally drawn to the brightest part of an image. Try placing your subject within the brightest area of the image so it naturally stands out from its surroundings. The highlighting of areas within an image will also help to add depth and another dimension to the photograph.
Shoot Bluebells Responsibly
Bluebells are delicate and easily damaged. It’s important to treat them with respect and tread carefully. Bluebells can take up to seven years to become established, even minor damage can have long-lasting impact with the plant taking several years to recover. Great images can be made from the woodland path therefore we do not need to trample all over our subjects to get a great image. Look for changes in path direction where you can position yourself so you appear to be somewhere you are not. Similarly be mindful of where you position your tripods legs or where you lay down the bag containing your gear. Hopefully if we treat our woodlands with respect they will remain for many generations to enjoy.
Let’s Connect
Sign Up For My Newsletter
Be the first to hear about my latest adventures, new blog posts and photography projects.
If you change your mind you can unsubscribe at any time.